Field dressing sounds intimidating the first time you read about it, mostly because the steps get jumbled together in most explanations. Broken into order, it is a calm, methodical job: open the body cavity carefully, remove the internal organs cleanly without contaminating the meat, and cool the carcass as fast as conditions allow. Do those three things well, in that order, and the rest is patience and hygiene.
This guide walks through the whole process in the sequence you would actually do it: what to check before you start, the short gear list that matters, each step in order, the mistakes that spoil meat, knife choice, and cleanup. Take it slowly. A clean cavity and fast cooling reward a steady hand far more than a fast one. If you only remember one sentence, make it this: keep everything clean, keep the blade under control, and get the meat cooling.
What does field dressing a deer mean?
Field dressing a deer means removing the internal organs soon after the harvest, in the field, so body heat escapes and the meat begins to cool. It lightens the carcass for transport, reduces the risk of spoilage and off-flavors, and leaves a clean cavity ready for hanging, further processing, or transport to a processor, depending on your local rules and your plan for the meat.
Field dressing is not butchering, and it is not skinning — those are later jobs, done at home, at camp, or by a processor. It is the first, time-sensitive step, and its purpose is meat care. Heat is the enemy in the first hours: a large, insulated body cavity holds warmth in, and opening it lets air circulate and the temperature fall, which protects flavor and texture more than any recipe ever will. It is also not a race, not a place for a dull knife, and not the moment to improvise. If light is fading or the ground is awkward, slow down, reposition, and use a headlamp rather than hurrying a cut you cannot see clearly.
Before you start: what do you need to check first?
Before any cut, confirm you have a valid tag and license for that deer, check your local season dates and field-dressing rules, and follow your area's tagging and reporting requirements exactly, because regulations vary by state, unit, and season. Then lay out gloves and your hygiene kit, keep clean water or wipes within reach, and plan how you will keep the meat clean and cool it fast once the cavity is open.
Regulations come first, and this guide cannot replace them. States differ on when a tag must be attached, whether a deer must be reported before it is moved, what proof of sex must remain attached, whether the carcass can be quartered in the field, and how chronic wasting disease rules affect transport in specific zones. Check the current rules for the exact place and season where you hunt — not last year's memory, and not a forum post. Your state wildlife agency's current regulations, app, or website is the source to trust; if a rule is unclear, call the agency before the hunt, not after.
Then set up your work area. Choose the flattest, cleanest ground nearby, ideally with a slight slope so fluids drain away from the carcass. Clear loose leaves and dirt, and lay your gear out in reach — knife, spare gloves, wipes, game bags, zip ties, headlamp — so you never dig through a pack with soiled gloves mid-job. That small bit of staging prevents most fumbling and contamination.
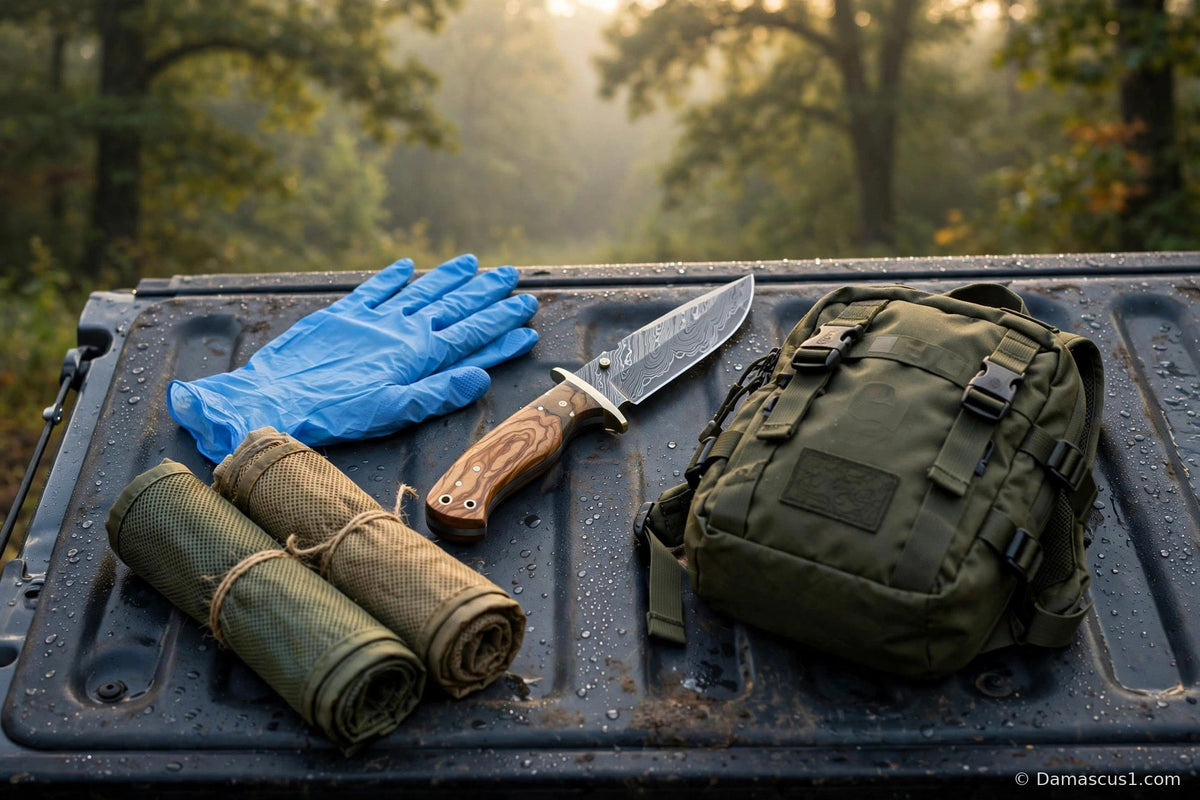
Your hygiene kit can stay simple: disposable nitrile gloves (at least two pairs, because a torn glove mid-job is common), hand wipes or water and soap, paper towels, a trash bag, and clean game bags. A short cord or clean stick helps prop the cavity open for cooling later.
Finally, think about cooling before you start. Where does the deer go next — vehicle, camp cooler, processor — and how warm is the day? Warm weather shortens every timeline in this guide, so plan to work promptly and get the meat to refrigeration or ice as soon as your regulations and transport plan allow.
What gear do you actually need to field dress a deer?

You need surprisingly little: one sharp fixed-blade knife you can control, disposable gloves, and clean game bags for transport. A small saw is optional for the pelvic bone, a headlamp helps in low light, and wipes, zip ties, and a trash bag keep the job clean. Sharpness, control, and hygiene matter far more than carrying a large kit full of specialized tools you rarely use.
Here is the working list, with what each item is actually for:
| Gear | Why it matters | Required or optional |
|---|---|---|
| Sharp fixed-blade knife, about 9.5 inches overall | Main cutting tool; no moving parts to clog or fail | Required |
| Nitrile gloves, 2+ pairs | Hygiene, grip, and easy cleanup | Required |
| Clean game bags | Protect the carcass from dirt and insects during transport | Required |
| Headlamp | Keeps both hands free in low light | Strongly recommended |
| Small bone saw or pelvic tool | Splits the pelvic bone if you choose that method | Optional |
| Zip ties and tag | Secures your tag as local rules require | Required where rules require it |
| Wipes, paper towels, trash bag | Cleanup for hands, blade, and the site | Strongly recommended |
| Cord or clean spreader stick | Props the cavity open so air can circulate | Optional |
| Folding knife as a backup | Light utility cuts, cord, and packaging — not the main tool | Optional |
Notice what is not on that list: a large assortment of blades. One good fixed blade, kept sharp, covers the field-dressing steps in this guide. If you are still choosing that knife, the Damascus1 tracker hunting knife collection is the natural place to compare the 9.5-inch fixed blades discussed in the knife-choice section below, and the broader guide to the best hunting knife explains how blade shape, handle, and steel affect field work in more depth.
A word on sharpness, because it decides how the whole job feels. A sharp edge works with light pressure, which keeps the blade predictable. A dull edge does the opposite: you push harder, the blade is more likely to slip, and ragged cuts make cleanup worse. Test your edge before the season — if it will not cleanly slice paper, it needs sharpening first. Carry the knife sheathed, and give it a fixed resting place — sheath, not ground — every time you set it down.
How do you field dress a deer, step by step?
Work in this order: position the deer on its back with the cavity draining away from you, open the body cavity with shallow, controlled cuts that avoid the stomach and intestines, free the windpipe and esophagus at the neck, split the pelvic bone or work carefully around it, roll the entrails out cleanly, then drain, wipe the cavity dry, and prop it open so air can cool the meat quickly.
Read all seven steps once before you start. Knowing what comes next keeps your hands in the right place and stops the most common beginner error — cutting deeper than the step requires. Almost every cut in field dressing is shallow and guided. Let the edge do the work, keep your free hand out of the blade's path, and reposition the deer rather than reaching awkwardly around it.
Step 1: Position the deer
Roll the deer onto its back and settle it so it will not rock while you work. On a slope, position it head uphill, so fluids drain away from the chest cavity. Spread the hind legs and brace the carcass — a partner holding a leg, or the legs settled securely against the ground, both work. Take a moment here: a carcass that shifts mid-cut is how shallow, controlled cuts turn into deep ones. If it keeps rolling, use the terrain — a log or a depression — to steady it before the knife comes out.
Step 2: Open the body cavity without puncturing the stomach or intestines
This is the step that decides whether the job stays clean. Start with a short, shallow opening cut through the hide and the thin abdominal wall near the breastbone area, then work toward the pelvis using your fingers as a guide under the blade. The classic technique is simple to describe and worth practicing mentally: slip two fingers under the abdominal wall, lift it gently away from the organs underneath, and let the blade ride between and slightly above your fingers with the edge facing outward, away from the organs. Your fingers create the gap; the blade only cuts the lifted layer.
Keep every cut shallow. The stomach and intestines sit directly under that wall, and puncturing them spills contents that taint meat — the most avoidable mistake in this guide. If the blade starts dragging into something soft underneath, stop, lift more, and reset your fingers. Work in short sections down to the pelvis. At the chest, open the sternum area only as far as needed; a small saw gives a cleaner result on a larger animal, and control beats force either way.
Step 3: Free the windpipe and esophagus
With the cavity open, reach into the chest and locate the windpipe and esophagus running up into the neck. Work them free with careful cuts close to the neck, cutting away from yourself and tracking your fingers at all times — this is close work in a space you partly feel rather than fully see, so go slowly. Freeing these at the top lets the organs roll out together later instead of tearing. Some hunters tie off the esophagus with a zip tie or cord to keep its contents sealed; if you do, keep the tied end pointed away from clean meat. Then cut the diaphragm — the thin sheet separating chest from abdomen — free around its edges, so the chest contents are released as one connected whole.
Step 4: Split the pelvic bone or work around it
At the rear, you have two choices, and both are legitimate. Splitting the pelvic bone with a small saw or a careful, controlled technique opens the rear canal fully, which makes removing the lower intestine clean and complete and lets the cavity cool and drain better afterward. Working around the pelvis instead means carefully cutting around the rear opening and freeing the lower intestine without splitting the bone — slower, more fiddly work in a tight space, but it avoids the saw entirely and keeps the hindquarters closed, which some hunters prefer in dusty or dirty conditions.
Whichever route you choose, the goal is identical: free the lower intestine completely, without cutting it, and keep its contents away from the meat. Take particular care around the bladder as well, which sits in this area — keep it intact and remove it with the entrails if possible, because spilled urine is another avoidable taint. If you split the bone, use a saw with short, controlled strokes rather than forcing a knife blade through bone, which dulls and chips edges and risks a slip.
Step 5: Remove the entrails cleanly
Now gently roll the freed organs out of the cavity onto the ground beside the deer, letting gravity help. Because you freed the windpipe at the top and the lower intestine at the rear, they should come largely as one connected mass. If something resists, do not yank — find the attachment, cut it carefully, and continue. Check for anything left behind: sections of intestine, the bladder, or loose tissue. A clean, empty cavity is the standard, because anything left inside slows cooling and affects flavor.
Step 6: Drain and wipe the cavity
Tip the carcass so any pooled fluid drains out rather than sitting in the cavity, then wipe the inside dry with clean paper towels or a cloth. Avoid washing with water from a questionable source — a stream or puddle can add more contamination than it removes. If you do use water, make it clean drinking-quality water, and still wipe the cavity afterward. Pick out any loose hair, dirt, or leaves one piece at a time. Fiddly, unglamorous work — and it matters, because what stays in the cavity stays against the meat for the whole trip out.
Step 7: Prop the cavity open to cool
Finish by propping the cavity open with a clean stick or spreader so air circulates freely. Cooling is the entire point of the job, and an open cavity in shade cools far faster than a closed one in sun. Keep the deer off warm ground where possible, and use a clean game bag for transport if insects or dirt are a concern and your regulations allow it. Then move promptly to the next stage — hanging, quartering where legal, or transport to a processor or refrigeration — rather than letting a well-dressed deer sit warm.
How do you cool the meat quickly after field dressing?

Cool the meat quickly by keeping the cavity propped open in shade, getting air moving through it, keeping the carcass off warm ground, and moving to hanging, refrigeration, or ice without unnecessary delay. In warm weather, shorten every step: work promptly, avoid leaving the deer in direct sun, and treat the trip to cold storage as part of the job, not something that happens whenever it happens.
Temperature and time work together. Meat that cools promptly tastes clean; meat that stays warm for hours develops the strong flavors people wrongly blame on venison itself. You cannot control the weather, but you can control shade, airflow, and delay — and those three usually decide the outcome. On a long carry out, consider whether your rules allow quartering or packing meat in clean game bags, which expose more surface area to cool air. If you hang the deer at camp, hang it in shade with the cavity open, protected from insects, and only as long as temperatures safely allow.
One detail is easy to miss: the hide insulates. In cold weather that helps briefly; in warm weather it holds heat in, which is why many hunters skin sooner in warm conditions — a point covered in the knife section below. Match the choice to temperature and distance, not habit.
What mistakes spoil meat during field dressing?
Three mistakes cause most spoiled meat: puncturing the stomach, intestines, or bladder so their contents taint the cavity; letting hair, dirt, and leaves stay in contact with the meat; and cooling too slowly, especially in warm weather. A fourth, quieter mistake is using a dull blade, which forces cuts, tears tissue, and makes every other mistake on this list more likely to happen.
A punctured gut is prevented by technique, not luck: lift the wall with your fingers, cut shallow, and never push a blade blindly into the cavity. If it happens anyway, act quickly — move spilled material away, trim heavily contaminated meat generously rather than washing contamination into surrounding tissue, and wipe the area clean.
Hair and dirt are slower problems. Work with hide edges folded back, change a soiled glove instead of working on in it, and pick contamination out as you go rather than planning one big cleanup at the end — by the end, there is always more than you expected.
Slow cooling has no single moment. It happens through a slow drag in the sun or a deer left whole and closed in a truck bed. Build the defense into your plan beforehand: know your route out, your shade, and your cold storage, and treat minutes as an ingredient.
Which knife is best for field dressing a deer?

A sharp, fixed-blade knife of about 9.5 inches overall is the most practical choice for field dressing, because it offers enough blade to work efficiently, a handle you can grip securely with gloves, and no hinge or lock to clog, loosen, or fail mid-job. Blade control, a comfortable handle, and an edge that starts sharp matter more than exotic features or an oversized blade you have to fight.
Size deserves a plain explanation, because bigger is a common beginner misjudgment. At about 9.5 inches overall, a tracker-style fixed blade gives you enough edge for the opening cuts and chest work, while staying short enough to control during the close, fingers-as-guide cuts inside the cavity — where control matters most. A much longer blade gets clumsy in that tight space; a very short one makes longer strokes slow and ragged. The middle is not a compromise here; it is the point.
Handle choice is mostly about grip in real conditions — cold hands, gloves, a handle that may not stay perfectly dry. Natural materials each behave a little differently, which is why the three trackers below, all in the same size and format, are worth comparing side by side. For blade shapes, grinds, and handle fit in more depth, read how to choose a hunting knife alongside the prices here.
| Knife | Price | Best for |
|---|---|---|
| Hunting Knife Olive Wood 9.5" Fixed Blade Tracker | $79.99 | A warm, natural wood grip and the lowest price of the three trackers |
| Camel Bone 9.5" Tracker | $89.99 | A smooth, distinctive bone handle in the same 9.5" format |
| Buffalo Horn 9.5" Tracker | $89.99 | A dark, polished horn handle with a classic field look |
What can a folding knife do — and what can't it do?
A folder earns its place as a backup, not as the main tool. The Olive Wood Damascus Pocket Knife — $39.99 is genuinely useful for cutting cord, opening packaging, trimming a tag tie, and light utility work around camp. What it cannot offer is the fixed blade's simplicity under load: a hinge collects material that is hard to clean in the field, a lock is one more thing to trust during a hard cut, and a shorter folding blade gives you less control in the cavity. Carry one, by all means — just do the main job with the fixed blade.
A brief word on skinning
Skinning usually happens after field dressing, at camp or at home, in a different rhythm: long, shallow strokes that separate hide from meat without scoring either. A controlled 9.5-inch fixed blade handles it well if you let the hide's own tension do half the job — free hand pulling the hide, not pushing the blade — and wipe the blade whenever material builds up. A clean skinning job, no deep scores and no hair left on the surface, pays off again at butchering time.
How do you stay hygienic and clean up properly?

Stay hygienic by wearing nitrile gloves from the first cut to the last, changing a torn or heavily soiled pair instead of working on in it, keeping clean wipes separate from used ones, and bagging all trash as you go. Afterward, wash your hands and forearms thoroughly with soap and clean water, and clean the blade carefully before it goes back into its sheath for the trip home.
Gloves do three jobs at once: they protect you, protect the meat from your hands, and make cleanup faster. Put them on before the first cut, check them when you pause — a nick is easy to miss — and swap pairs freely. That is why the gear list says two pairs minimum; three costs almost nothing in weight.
Cleanup order matters. Finish the carcass work first, then deal with yourself and your tools. Peel gloves off so the soiled surface folds inward, bag them with your trash, and wash up properly if soap and water are available. Leave the site clean: gloves, wipes, and packaging all leave with you.
How do you care for your blade after field work?

Care for the blade the same day: wash it in warm, soapy water, dry it completely — including around the handle — and apply a thin coat of food-safe oil before storing it dry, outside a damp sheath. Field work leaves moisture and residue on steel that will mark or rust a blade left dirty overnight, so the wash, dry, and oil routine is not optional maintenance; it is part of the hunt.
Damascus steel deserves one extra sentence here, because its layered pattern can hide neglect until it shows as discoloration. The short answer to the question hunters ask most is yes — like other high-carbon steels, it can rust if it is stored wet or dirty. The full explanation, including how to handle early spots and how to store a blade between seasons, is in can Damascus steel rust — worth reading once, before you need it.
Check the edge while you clean — contact with bone can roll or dull it without any dramatic moment. Run the same paper test; if it has dulled, sharpen it now rather than rediscovering the problem next time. Wipe the sheath if material got inside it, let everything dry fully, and store the knife dry. Ten unhurried minutes protects the tool that did the hardest work of the day.
Frequently asked questions
How long does it take to field dress a deer?
For a beginner working carefully, allow roughly thirty to forty-five minutes for a first, unhurried job, and expect it to get faster with practice. Rushing is a poor trade: the extra minutes spent on shallow cuts and a clean cavity protect the meat far more than a quick finish, especially in warm weather when prompt cooling still matters after the dressing itself is done.
Do you need a saw to field dress a deer?
No. A saw is optional. It helps if you choose to split the pelvic bone or work through a larger breastbone, and many hunters find it cleaner than forcing a knife, but you can field dress a deer completely by working around the pelvis instead. Choose the method you can perform most carefully with the tools you actually carry, not the method that sounds most advanced.
Should you wash the body cavity with water?
Generally, wipe it dry instead. A clean, dry wipe with paper towels removes loose material without spreading it, while water from a stream or puddle can introduce contamination. If you rinse at all, use clean drinking-quality water, then still wipe the cavity and let it dry as much as conditions allow before transport. Dry and clean beats wet and questionable every time.
What temperature is too warm to leave a deer before processing?
There is no single safe number that covers every situation, because time matters as much as temperature. As a working rule, the warmer it is, the faster you should move from field dressing to hanging in shade, refrigeration, or ice — and in genuinely warm weather, treat delays in hours as a real risk to meat quality. When in doubt, shorten the timeline and choose cold storage sooner rather than later.
Can you field dress a deer alone?
Yes, the steps in this guide can all be done solo, and many hunters work alone. Solo work rewards extra staging: lay out every item before you start, position the carcass so it stays put without a second pair of hands, and give yourself light and time. A partner makes bracing and repositioning easier, but preparation, not headcount, is what keeps a solo job clean and controlled.
What do you do if you puncture the stomach or intestines?
Stop, keep calm, and contain it. Move the spilled contents away from the meat promptly, avoid spreading them with wiping motions across clean tissue, trim any heavily contaminated meat generously, and wipe the affected area clean. Then continue the remaining steps carefully. A small, promptly handled puncture is a setback; contamination left sitting against warm meat while you finish is what turns it into spoiled meat.
Ready to choose the knife for the job?
Field dressing rewards preparation over improvisation: legal tag checked, gear laid out, blade sharp, steps in order, meat cooling fast. If your knife is the weak point in that list, fix it before the season rather than during it. Compare the three 9.5-inch trackers and the full range in the tracker hunting knife collection, start with the Hunting Knife Olive Wood 9.5" Fixed Blade Tracker — $79.99 if you want the best-value entry point, and then re-read the steps above once with your actual gear in front of you. A careful first job, done cleanly and legally, is the standard — and it is entirely within reach.
Leave a comment: