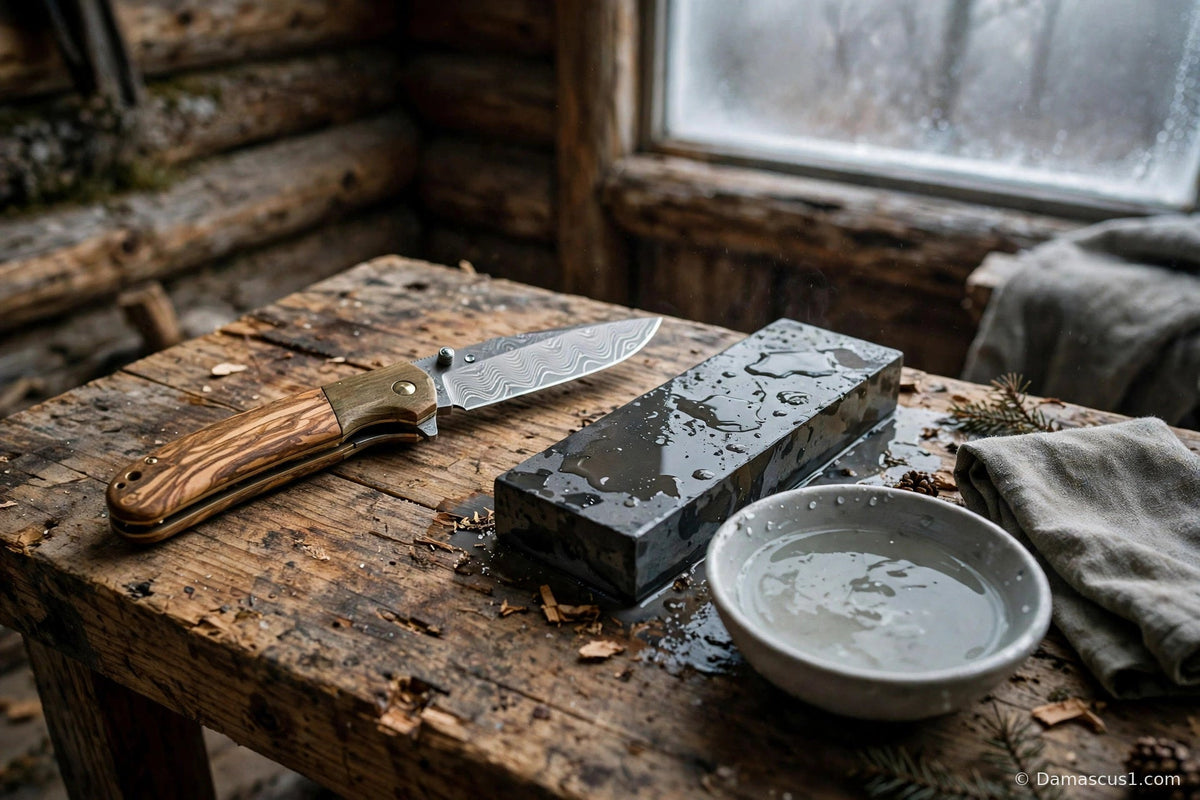
The short answer: Sharpen a Damascus pocket knife on a whetstone exactly as you would a plain carbon-steel folder — soak the stone 10 to 15 minutes, hold the blade at 15 to 20 degrees, work each side until a burr forms, then refine on 3000 grit or finer and strop. The one Damascus rule: keep the stone on the edge bevel and off the blade flats, because the famous pattern is an etched surface finish and coarse grit dragged across the flats will dull it.
That answer is simple. Doing it on a folding knife, in a Canadian house, in November, is where every guide currently ranking quietly stops helping you. Open the top results for this search and you will find good, careful whetstone advice — written almost entirely for kitchen knives. Long blades. Fixed handles you can grip like a hammer handle. A knife that cannot fold shut on your fingers halfway through a stroke. None of that describes the knife in your pocket.
A pocket knife changes the job in three specific ways, and this guide is built around all three. First, the blade is short, so the long sweeping stroke the kitchen guides teach does not fit; you sharpen in short, controlled sections and your angle discipline has to come from your hands, not from momentum. Second, the knife folds, so before any stone work you have to manage the one safety fact that matters: the blade must be fully open, locked, and treated as a fixed blade for the whole session — and on a back-lock folder there is a right way to hold it so your fingers never sit where the blade would close. Third, a Damascus folder in Canada lives a particular life: it comes in from the cold, it sits in heated rooms where winter air is brutally dry, it gets put away in a sheath or a drawer for weeks between trips. The sharpening is the easy half. The drying, the light film of oil, and the storage decision are what decide whether the pattern still looks like anything in February.
So this is the folder owner's version of the whetstone method, written for Canada: the stone work itself, the pattern-protection rule that makes Damascus different, the locked-open handling nobody else covers, an honest comparison with the rolling sharpener (a real product, a genuinely different method, and not the recommendation here), and the winter routine that keeps a non-stainless blade honest through the season. No invented test results, no miracle claims — just the method, in the order you will actually do it.
Do you sharpen Damascus steel differently from ordinary steel?


At the edge, no — and that is the most useful sentence in this whole guide. The expert guides agree on it, and the clearest statement comes from a maker who works the steel: sharpen Damascus exactly like 1095 carbon steel, because the folded layers are carbon steels and the edge behaves the same way on the stone. Same angles, same grit progression, same burr, same finish. If you already know how to sharpen a carbon-steel hunting knife, you already know how to sharpen a Damascus pocket knife. Nothing about the layers makes the edge fragile, exotic, or in need of a specialist.
Where Damascus genuinely differs is cosmetic, and the difference matters precisely because the pattern is why you bought the knife. That flowing, watery figure in the blade is not in the steel the way grain is in wood — it is revealed by an acid etch that darkens one of the two layered steels more than the other, leaving a contrasting surface finish. Abrasive does not care about your finish. Drag a coarse stone, a sloppy stroke, or the flat of the blade across grit and you will scratch through the etch and dull the contrast wherever you touched. The edge bevel itself will brighten as you sharpen — that is normal, unavoidable, and honestly it looks right: a bright, keen bevel under a dark patterned flat is the sign of a Damascus blade that gets used and maintained. But the flats are yours to protect, and protecting them is a technique, not a product: stone on the bevel only, bevel at its proper angle, never laid flat.
Hold both halves of that together and the mystique around "Damascus sharpening" evaporates. Edge: ordinary. Flats: careful. Everything else in this guide is working out what those two words mean on a short folding blade.
What do you need before you start?
Less than the internet wants to sell you. A combination whetstone — 1000 grit on one side, 3000 or finer on the other — is the whole sharpening kit for routine work, and it is the setup the stone guides converge on: start at 1000 for ordinary sharpening, finish at 3000 or higher, and only drop to a coarse stone (400–800 territory) if the edge is chipped or truly wrecked. Add a shallow tray or baking dish of water for soaking, a damp cloth or non-slip mat to park the stone on, a leather strop (a plain leather belt on a flat board works for field purposes), a soft dry cloth, and a drop of light oil for afterwards. That is the list. A Canadian angle on it, since it is November: all of this lives happily indoors at the kitchen table, which is where winter sharpening happens — the garage in January is nobody's classroom, and cold hands hold angles badly.
Two tools you will see recommended elsewhere deserve an honest word here rather than a sales pitch. The first is the pull-through sharpener — the little two-slot device a Canadian public-health source, the BC Centre for Disease Control's Food Skills for Families knife-care sheet, lists as a legitimate second option for family kitchen knives, coarse slot to sharpen and fine slot to hone. For an inexpensive kitchen knife, fair enough. For a patterned folder you care about, a pull-through's fixed crossed abrasives give you no control over where metal comes off, and "no control" is exactly what the flats rule forbids — this guide does not recommend one for Damascus. The second is the electric sharpener, and here the guides are blunt: avoid it. It removes material fast, heats and grinds without feel, and offers the patterned flat no protection at all. Speed is the one thing a short pocket blade does not need; the whole edge is a few centimetres long.
Our own second product sits in this landscape honestly, and it gets its own section below rather than a quiet plug here: the Rolling Knife Sharpener (diamond kit) at $39.99 USD, a rolling diamond sharpener with a magnetic holder and fixed 15- and 20-degree angle guides. It is a genuinely different answer to the angle problem — it fixes the angle mechanically instead of asking your hands to learn it — and for straight kitchen knives that trade-off can make sense. A folder is a different case, for reasons that section will walk through properly.
How do you set up the stone and find the angle?
Soak first, and soak properly. A water stone goes into its tray of water for 10 to 15 minutes, until the stream of small bubbles rising off it stops — that is the stone telling you it is saturated. A stone that is still drinking will keep pulling water off its own surface mid-stroke, the slurry dries out, friction climbs, and your strokes get grabby exactly when you want them smooth. Set the soaked stone on the damp cloth so it cannot skate, keep the tray beside you, and splash water back onto the surface whenever it starts to look dry. Sharpening a short blade is stop-and-start work; re-wetting between sections becomes part of the rhythm.
The angle is the skill. For a pocket knife, work at 15 to 20 degrees per side — the range the expert guides give for Damascus and for folders alike, with the lower end suiting lighter slicing work and 20 degrees the safer all-round teaching number if you are new. What does 20 degrees look like with no protractor in the house? Lift the spine of the blade off the stone by roughly the thickness of two stacked coins while the edge touches — that coin-stack picture is the oldest angle guide in sharpening and it still works, which is why one of this post's photographs stages exactly that: stone soaking, knife beside it, coins on the table. Some sharpeners mark the bevel with a felt pen before the first session and watch where the stone wipes the ink away; on a Damascus bevel that trick is genuinely useful, because it shows you in one stroke whether you are on the bevel, rolling onto the flat, or standing the edge up too steep. If the ink on the flat starts disappearing, your angle has collapsed — stop, lift the spine, begin again.
Consistency beats precision here. A steady 19 degrees will out-sharpen a wobbling attempt at exactly 17.5, every time, and the folder makes steadiness harder than the kitchen guides admit: there is less blade to register against the stone and less handle to lever with. The next section is the one Google currently has no good answer for — how to actually hold and move a folding knife on a stone.
How do you sharpen a folding knife safely on a whetstone?
Open it, lock it, and prove the lock before the blade ever meets the stone. On a back-lock folder — the design of the knife this guide is built around — you open the blade fully until the lock clicks home, then test it with firm downward pressure on the spine over the table, handle held so that if anything gave way the blade would close onto wood, not fingers. It will not give way; you test anyway, every time, because the test is what turns "locked open" from an assumption into a fact. From that moment, treat the folder as a fixed-blade knife for the entire session. It does not get half-closed to check the edge. It does not get passed hand to hand. It is a short fixed blade that happens to have a hinge, and the hinge is out of your mind until the stone work is finished.
Grip is the folder-specific skill. Your dominant hand takes the handle with a full, honest grip — not pinched at the bolster, not choked up onto the blade — and your other hand's fingertips rest lightly on the flat of the blade near the edge, doing two jobs: keeping the angle honest and supplying the gentle downward pressure. Those fingertips ride on the flat above the bevel, pressing the bevel onto the stone; they never sit on the edge itself, and they stay behind the edge's line of travel. Work in sections, because the blade is short: cover the edge from heel to tip in overlapping short strokes, lifting and resetting rather than raking the tip off the end of the stone. The classic kitchen stroke — one long sweep the full length of a 20-centimetre chef's knife — simply has no room to exist here, and trying to fake it is how tips get rounded and flats get scratched. Short blade, short strokes, full coverage. Edge-leading strokes, as if you were shaving a thin slice off the stone's surface, keep the work honest and the burr clean.
Keep the knife's own design working for you rather than against you. The hero of this guide, the Olive Wood Damascus Pocket Knife Set at $39.99 USD (compare-at $89.99), is a manual two-hand nail-nick opener with a back-lock — you open it with a thumbnail in the crescent nail nick, both hands, deliberately, against a stiff backspring. That same deliberate stiffness is a sharpening virtue: the blade opens all the way, locks with a click you can hear, and stays where you put it. It is single-edged, 6.5 inches overall, with a forge-welded 1095 and 15N20 blade of roughly 276 layers at 58–60 HRC and an olive wood handle. Nothing about it is one-hand, flipper, assisted or automatic, and on the stone that slowness reads as control. When the session ends, the closing is a two-hand job too: press the back-lock, fold the blade away with your fingers clear of its path, and only then is it a pocket knife again.
One more piece of table discipline, learned in every workshop that teaches this: the stone sits still, the knife moves, and nothing else is on the table within the stroke's reach — no coffee mug at the elbow, no phone under the tray. A short blade on a wet stone in a warm kitchen is a calm, almost meditative job. Keep it that way by removing the one surprise that could change it.
How do you raise a burr, and why does the burr run the whole method?
Work one side at a time on the 1000-grit face, even pressure, section by section, until you can feel a burr along the opposite side of the edge. The burr is a whisper-thin curl of steel that bends over the edge as you grind — you detect it by drawing a fingertip very lightly across the blade, moving from spine toward edge (never along it), and feeling the faint catch, the slight roughness that was not there before. Every serious guide builds its method on this moment — KBS's expert guide, the stone specialists, the Canadian Food Skills sheet in its own simpler language — because the burr is the only proof that you have actually ground all the way to the edge along its whole length. No burr, no new edge; you have been polishing the bevel's shoulder and calling it sharpening.
On a short folder blade the burr check does double duty. Because you work in sections, you check in sections: burr at the heel, burr through the middle, burr at the tip. The classic beginner's folder — sharpened enthusiastically in the middle, untouched at both ends — announces itself exactly here, in a burr that exists for the centre centimetres and vanishes where the stroke got lazy. Fix it on the same grit, with the same patience, before you ever flip the knife. Then grind the second side until its burr forms the same way, and the edge — the actual apex where the two bevels meet — now exists along the full length of the blade. Everything after this paragraph is refinement. Everything before it was the sharpening.
Now change your touch. Flip to the 3000-grit (or finer) face, re-wet it, and repeat the work with noticeably lighter pressure, alternating sides more often — a handful of strokes per side, then swap — so the burr gets ground finer and finer rather than folded back and forth like a hinge. Heavy pressure at this stage is the most common way a good edge goes backwards: the thin apex flexes, the burr fattens instead of shrinking, and the knife comes off the fine stone duller than it went on. Lighten up. Let the stone do the cutting. Finish with a few single alternating strokes, one per side, at the lightest pressure you can manage while keeping contact — then wipe the blade clean and dry before the strop, because slurry left sitting on a non-stainless blade while you tidy up is moisture doing quiet work you did not invite.
How do you strop a pocket knife — at home and in the field?
Stropping is the step that turns a sharpened edge into a finished one, and it is the step the kitchen-led guides most often skip for folders. A strop is just leather — a paddle strop at home, a belt or the flat of a leather sheath-side in the field — and the motion is the mirror image of the stone work: edge-trailing, spine first, drawing the blade away from the edge so the leather gently pulls the last microscopic remnant of burr straight and polishes the apex without grinding anything. Same 15-to-20-degree angle, same section-by-section coverage, a dozen or so light passes per side. Pressure is the whole secret and the whole trap: press like you mean it and the soft leather wraps up over the apex and rounds it — the famous "stropped it dull" outcome. Feather-light. Let the leather kiss the bevel, not grab it.
The field version is where the folder earns its keep, and it is staged in one of this post's photographs for a reason: a camp table in late-autumn Canada, fallen maple leaves on wet boards, the strop laid flat and the knife worked along it between jobs. A pocket knife that cuts rope, feather sticks, packaging and food on a trip does not need the stone at the picnic table — it needs sixty seconds of stropping at day's end to stand the edge back up, and it saves its real sharpening for home. That division of labour is the practical heart of owning a folder: stones live at home, leather travels. A strip of leather in the pack weighs almost nothing and asks nothing, which is more than can be said for carrying a water stone into the bush and soaking it in a cold lake in November.
Back home, the strop has one more job: it is the between-sharpenings tool. Most "dull" folders are not dull at all — the apex has rolled slightly in use and the edge feels tired while the bevel is still sound. A minute on leather restores that edge without removing metal, and reaching for the strop first is how a 1000-grit stone session stays an occasional event instead of a weekly erosion of your blade. Sharpen rarely, strop often, and a short blade keeps its steel for years.
Whetstone or rolling sharpener — which should a Canadian folder owner actually use?
This is the decision the whole post turns on, so here it is as one honest table. It is also this guide's citable asset: screenshot it before you buy anything.
| Method | How it holds the angle | On a short folding blade | Effect on the Damascus pattern | Skill and cost picture |
|---|---|---|---|---|
| Whetstone (this guide's recommendation) | Your hands, learned — coins/felt-pen tricks help at first | Full control in short sections; blade locked open and handled as a fixed blade; tip coverage is your responsibility | Stone stays on the bevel and off the flats — the pattern is protected by technique | One combination stone (1000/3000) serves for years; the skill, once learned, sharpens every knife you own |
| Rolling sharpener (diamond kit) | Mechanical — fixed 15° and 20° guides with a magnetic holder | Honestly awkward: designed around straight kitchen blades held in a magnetic block; a short folder blade gives it little to hold and the handle and lock get in the way | No flat contact in normal use, but no folder-specific control either — the method was not built for this knife | The Rolling Knife Sharpener at $39.99 USD removes the learning curve for kitchen knives — a real virtue, for the knives it fits |
| Pull-through sharpener | Fixed crossed abrasives | Fast, and the coarseness is not yours to choose; poor tip control | No protection for the flats; not recommended for a patterned blade you care about | Cheapest and quickest; listed by the BCCDC Food Skills sheet as a family-kitchen option — a different job from caring for Damascus |
| Electric sharpener | Motorised fixed slots | Far more removal than a short edge needs; heat and speed with no feel | The guides are blunt: avoid — too aggressive for the layered pattern | Buys speed a pocket knife never needed |
| Honing steel / rod | Your hands, at the sharpening angle | Realigns a rolled edge; does not grind a new one | No meaningful contact with the flats when used on the edge only | A maintenance tool between sharpenings, not a sharpener — the Food Skills sheet makes the same distinction |
Read the rolling row carefully, because this guide sells that sharpener and is still telling you to learn the stone. That is not false modesty; it is fit. A rolling sharpener solves the angle problem mechanically, and for a drawer of straight kitchen knives in a busy Canadian household that is a legitimate, time-saving answer — diamonds, fixed 15- and 20-degree options, no soaking, no slurry. But its magnetic holder wants a flat, straight, reasonably long blade to grip, and a 6.5-inch folder offers it a short curved edge, a handle in the way, and a lock to work around. Tools should be matched to the knife in front of you. For this knife — the folding one, the patterned one — the whetstone is the recommendation, the strop is its partner, and the roller stays what it honestly is: the right answer to a different question, waiting in the kitchen where it belongs.
What changes in a Canadian winter?
Everything after the sharpening. A Damascus folder like the hero here is not stainless — the 1095 and 15N20 layers are carbon steels, chosen for edge and pattern, and carbon steel's side of the bargain is that it must be kept clean and dry and oiled lightly, or it will spot. Summer makes that easy to forget. A Canadian winter makes it impossible to ignore, for three reasons that compound.
First, the coming-in-from-the-cold problem. A knife that has been in a truck console or a pack at −15 comes into a warm house and immediately collects condensation — the same fog that mists your glasses mists the blade, inside the pivot and along the flats where you cannot see it. The routine is thirty seconds: open the knife, wipe it down, let it sit open on a cloth until it reaches room temperature and dries, then close it. Second, heated indoor air is desert air. Forced-air heating drags indoor humidity down all winter, and while dry air is kind to steel, it is hard on the olive wood handle — wood that dries and shrinks microscopically around its pins is wood that appreciates the same light oil wipe you are already giving the blade, cloth carried over the handle as the last pass. Third, storage: a folder put away "for the season" in a leather sheath in an unheated space has been handed the worst of both worlds — leather holds moisture against the blade, and an unheated garage or cabin cycles temperature and condensation for months. Store the knife clean, dry and lightly oiled, in the house, in a dry drawer or roll — sheath off, or sheath on only once both are bone dry and only for transport. The winter photograph in this post — knife on a cloth on a windowsill, sheath beside it rather than around it, snow on the spruces outside — is the storage rule drawn as a picture.
November is also, practically, when this work happens. Hunting season edges are tired, the gift folders are about to be given, and the sharpening session itself moves indoors to the kitchen table for the next five months. Build the winter habit now — wipe, warm, dry, oil, store dry — and the blade that comes out for the first spring trip looks the way it did when you put it away. For the broader care routine this sits inside, our Damascus folding knife care guide covers cleaning, pivot care and rust questions in full, and Can Damascus steel rust? answers the corrosion question head-on.
How does this guide fit with the rest of the library?
This post is the folder-specific sharpening leg, and it is deliberately narrower than our flagship how to sharpen a Damascus knife guide, which covers the whetstone method across the whole Damascus range — kitchen knives included — in full depth. Read that one for the general method; read this one when the knife folds, the blade is short, and the season is Canadian winter. Around those two sit the Canada hubs: Damascus pocket knife in Canada for buying routes and prices, Are pocket knives legal in Canada? for the mechanism law and the border picture (general information, not legal advice — the short version being that ordinary manual folders are legal to own, with no federal blade-length limit, and a stiff two-hand nail-nick design sits on the low-risk side of the border flick test by design, with no border outcome ever guaranteed), and Real vs fake Damascus steel in Canada for telling forge-welded layers from a printed pattern before you spend anything on sharpening gear. Two more links are planned from today's sibling posts — the Damascus-vs-stainless pocket knife comparison and the olive wood pocket knife guide — once they are live. [PLANNED links — do not add as live URLs until those posts publish.]
The Olive Wood Damascus Pocket Knife Set — $39.99
Real Damascus steel, an olive wood handle and a genuine leather sheath included — the knife our readers ask about most.
Shop the Olive Wood Damascus Pocket Knife Set — $39.99 · Free US shipping on orders over $50.
Frequently asked questions
How do you sharpen a Damascus pocket knife without damaging the pattern?
Sharpen it on a whetstone exactly like a carbon-steel knife — soak the stone 10–15 minutes, hold 15–20 degrees, work to a burr, finish at 3000 grit or finer, then strop — with one rule added: keep the stone on the edge bevel and off the blade flats. The pattern is an acid-etched surface finish; coarse abrasive dragged across the flats scratches through it and dulls the contrast. The bevel itself brightening as you sharpen is normal and expected.
What grit whetstone should you use for a Damascus pocket knife?
Start routine sharpening at 1000 grit and finish at 3000 grit or higher — the progression the stone guides converge on. Drop to a coarse stone (roughly 400–800) only to repair a chip or a badly worn edge, and expect to spend longer on the finer grits afterwards bringing the finish back. A single 1000/3000 combination stone covers a folder's whole life for most owners.
What angle do you sharpen a Damascus pocket knife at?
Between 15 and 20 degrees per side. Twenty degrees is the forgiving teaching angle and suits general camp, work and everyday use; the lower end of the range suits lighter slicing. If you have no gauge, lift the spine about two stacked coins' thickness off the stone while the edge touches. Consistency matters more than the exact number — a steady angle beats a wobbling precise one.
Can you use a rolling sharpener on a Damascus pocket knife?
You can try, and this guide sells one — the Rolling Knife Sharpener (diamond kit) at $39.99 USD, with fixed 15- and 20-degree guides — but it is honestly the wrong fit for a folder. Its magnetic holder is built for straight, flat kitchen blades; a short folding blade gives it little to grip and the handle and lock obstruct the roll. For kitchen knives it removes the learning curve. For a Damascus pocket knife, the whetstone stays the recommendation.
How do you sharpen a folding knife without it closing on you?
Open it fully until the lock clicks, test the lock with firm pressure on the spine over the table, and then treat the knife as a fixed blade for the whole session — full grip on the handle, fingertips of the other hand on the flat above the bevel, never on or ahead of the edge. Work in short sections, and close it two-handed only when the stone work is done. A back-lock folder opened and locked properly does not close under sharpening pressure when it is held this way.
How often should you sharpen a Damascus pocket knife?
Less often than you think, if you strop. Strop lightly after a day of real use and whenever the edge starts to feel tired — most "dull" folders have a slightly rolled apex, not a worn bevel, and leather stands it back up without removing steel. Take the knife to the 1000-grit stone when stropping no longer brings the edge back, which for ordinary camp, work and kitchen-adjacent use is an occasional job, not a weekly one. Every stone session removes metal; make each one count.
Will sharpening ruin the Damascus pattern over time?
Normal whetstone sharpening will not — the pattern lives in the etched flats, and correct technique never touches the flats. The bevel brightens with sharpening, which is normal. What dulls the pattern is abrasive across the flats: a collapsed angle, a pull-through's uncontrolled contact, or aggressive electric sharpening. If flats ever do lose contrast through scratches or wear, a re-etch can restore the finish — a workshop job, and one correct technique makes unnecessary.
How do you store a Damascus pocket knife through a Canadian winter?
Clean, fully dry, and lightly oiled — and not sealed in its sheath in an unheated space. Bring a cold knife indoors open, wipe the condensation off, and let it warm and dry on a cloth before closing it. Store it in the house in a dry drawer or roll; keep the leather sheath for transport, and only once both knife and sheath are bone dry. Heated indoor air is very dry in winter, which suits the steel — the same light oil wipe benefits the olive wood handle. The steel is not stainless, and winter is when that sentence earns its keep.
The last word: stone at home, leather in the pack, oil before the snow
Sharpening a Damascus pocket knife is ordinary carbon-steel work with one cosmetic rule — bevel yes, flats no — plus the three folder skills no kitchen guide teaches: lock it open and hold it like the short fixed blade it temporarily is, work in sections instead of sweeps, and strop it back to life between real sharpenings. Add the Canadian half — dry it when it comes in from the cold, oil it lightly, store it in the house and out of its sheath — and the knife that rides in your pocket this November is the knife that comes out clean in April. If you are starting from zero, the kit is one combination stone and, for the knife itself, a deliberately manual folder like the Olive Wood Damascus Pocket Knife Set at $39.99 USD — forge-welded 1095 and 15N20, roughly 276 layers, olive wood handle, back-lock, engraving available on request if it is headed for a gift box. The store banner reads "Free Shipping & Returns above $50!" — two folders at $79.98 USD cross that line, which is the honest arithmetic for a his-and-hers or a gift-plus-one order, with prices in USD exactly as listed and no delivery date promised by anyone. Learn the stone once, and every knife you ever own gets sharper for free. That is the whole method, and it fits on the back of a whetstone box.
Leave a comment: